Paint Vs Wallpaper
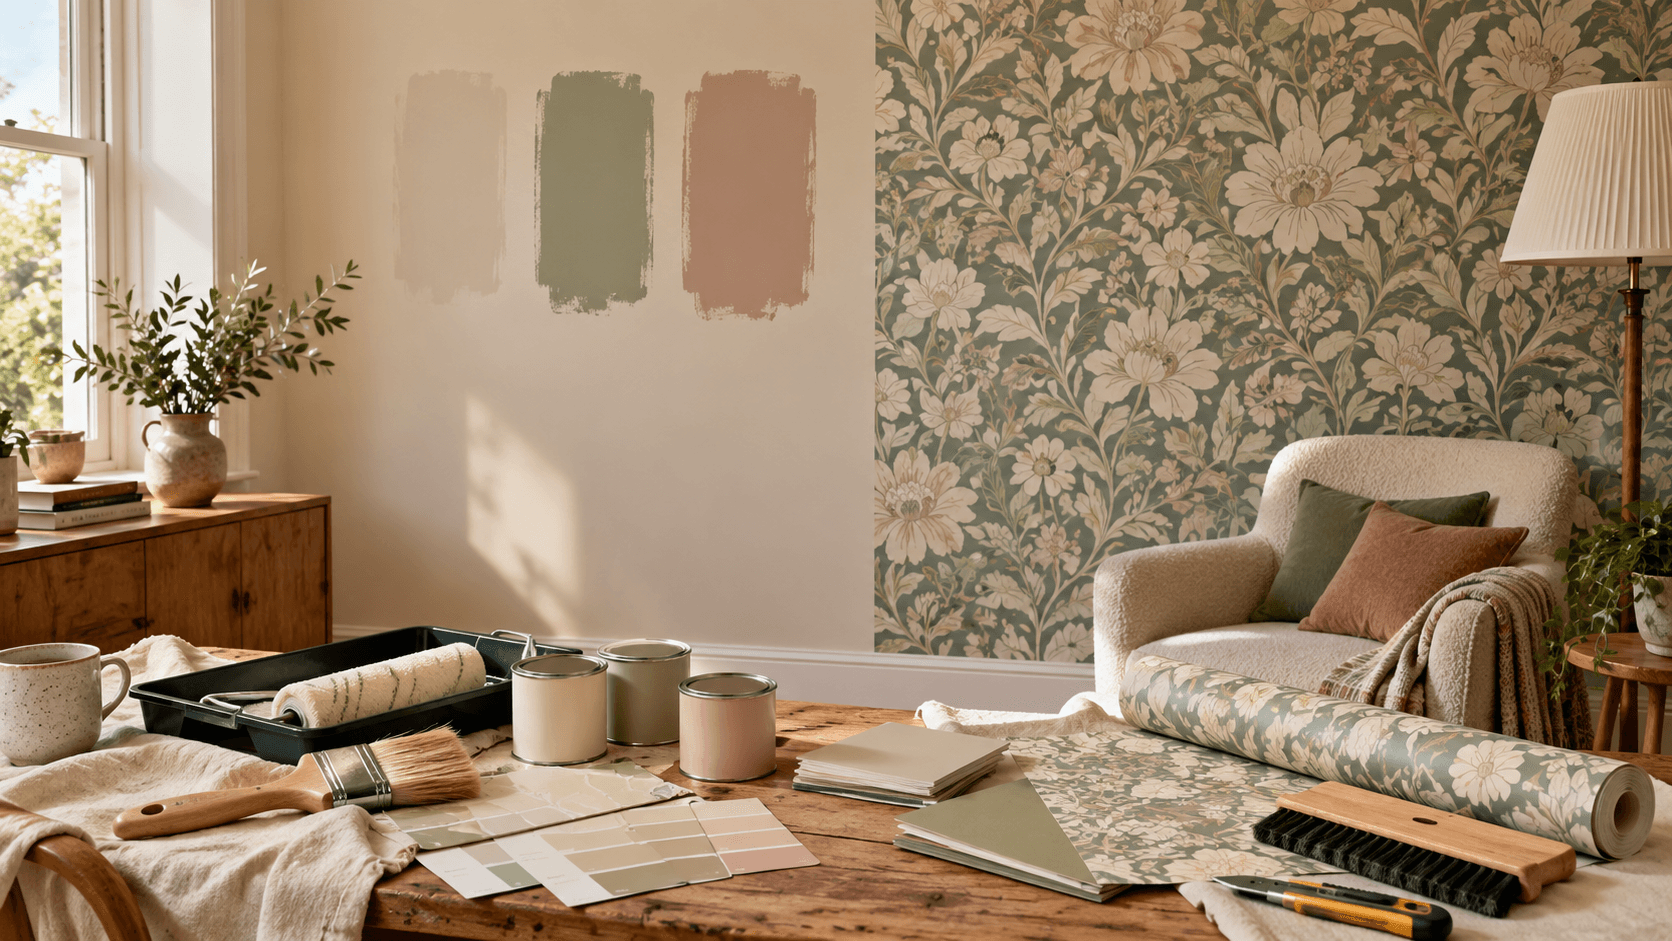
Paint or wallpaper is one of those decisions that sounds simple until you are actually standing in the room trying to work out what will look best.
Paint is usually the easier option. It is flexible, relatively quick to change and works well if you like to update your home regularly. Wallpaper gives you something different though. Pattern, texture and character can completely change a room without needing loads of extra styling.
For us, it really comes down to the room and what you want it to feel like.
Paint works brilliantly if you want a calmer backdrop, colour drenching, painted panelling or something you can easily refresh later. Wallpaper is great when you want to make more of a statement, especially behind a bed, on a chimney breast, in an alcove or in a smaller space like a downstairs toilet.
If your walls are not perfect, neither option is a magic fix. Paint can highlight bumps and cracks, while wallpaper still needs a decent surface underneath it. A bit of filling, sanding and prep makes far more difference than people sometimes realise.
Cost can vary too. Paint is often cheaper to get started with, but premium paint adds up quickly. Wallpaper can be expensive by the roll, especially when you need extra for pattern matching, although using it on one feature wall can actually be a really affordable way to make a big impact. Check out our other article about how to find cheaper options of premium brand paints.
If you are new to decorating, paint is probably the easiest place to start. Wallpaper takes a little more patience, but modern paste the wall papers are much more beginner friendly than they used to be.
And you do not have to choose one or the other.
Some of our favourite rooms use both. Wallpaper above panelling, a patterned feature wall with the remaining walls painted in a matching shade, or a wallpapered alcove can all work really well.
Before you commit, think about the light in the room, what furniture is staying, how often you like to change things and whether you actually love the idea enough to live with it.
If you are torn between two looks, Room Studio can also help you visualise how a new colour or feature wall might work in your own space before you start buying everything.
Our biggest tip? Do not choose paint or wallpaper because it is trending. Choose the one that suits the room, your budget and how you actually live in the space.
The DIY Painting and Decorating Toolkit
Painting is one of the easiest places to start if you want to have a go at DIY.
It is not completely foolproof, and there is definitely a knack to getting a good finish, but compared with some of the bigger jobs in a renovation it is a really good way to build confidence without feeling completely out of your depth.
The good news is you do not need to buy every decorating tool you see either.
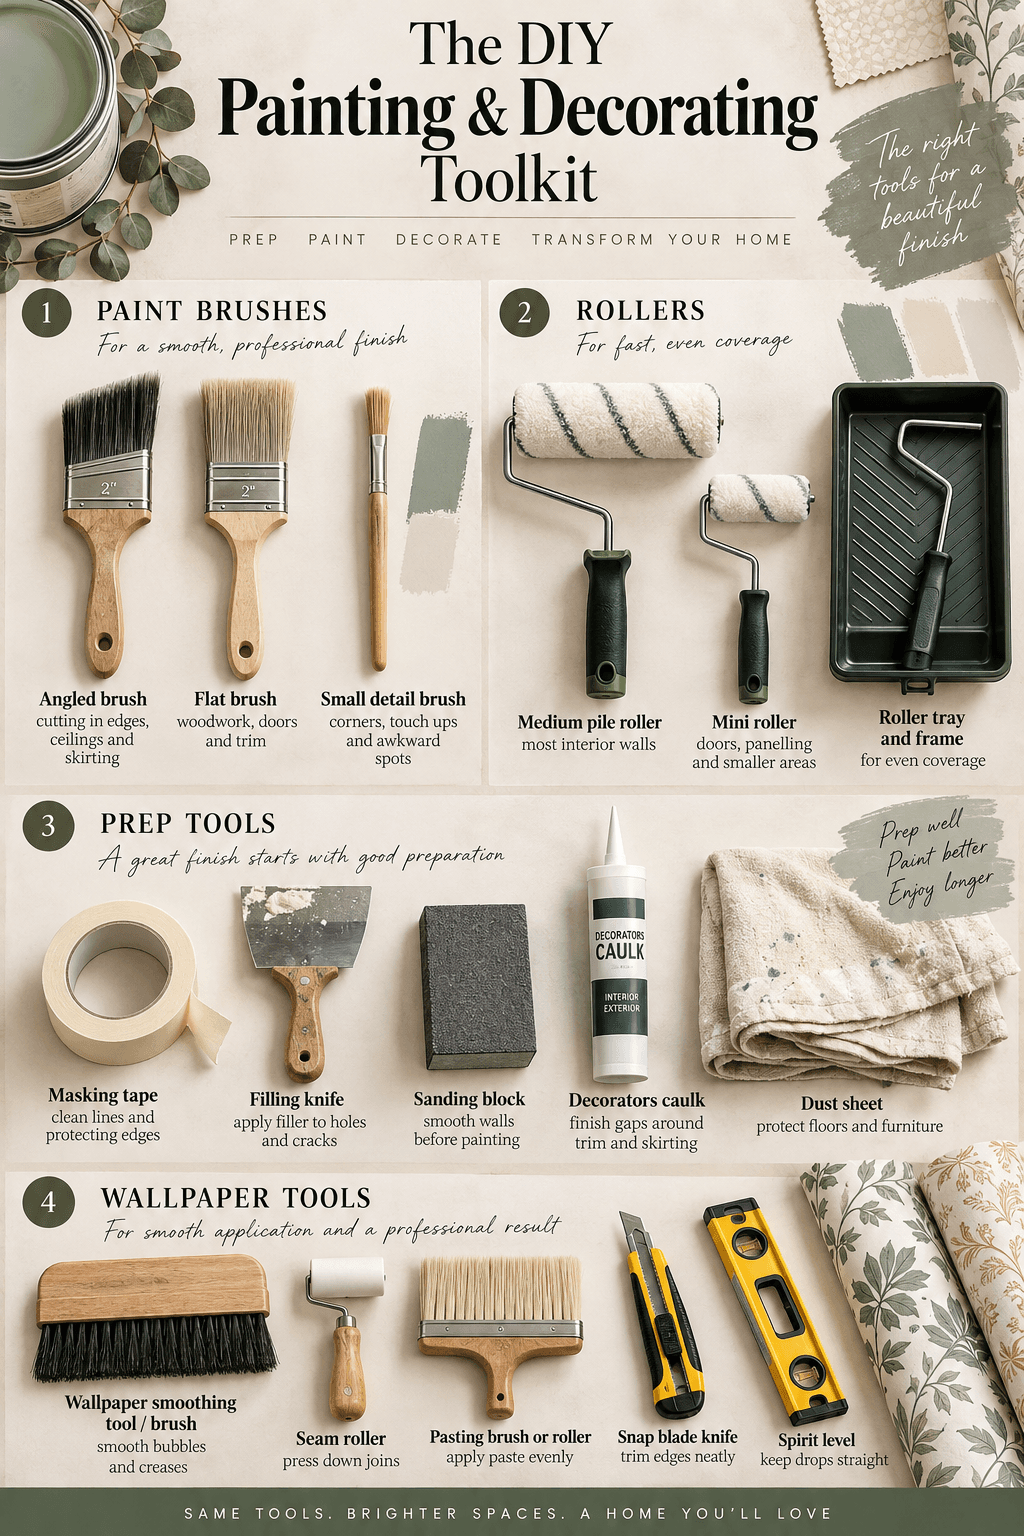
For most rooms, the basics will take you a long way. A decent roller and tray, a mini roller, a few good brushes, masking tape, dust sheets, filler, sandpaper and a filling knife are usually enough to get started.
One thing we have learned is that not every brush is the same.
A standard brush is fine for general painting, but an angled brush is brilliant for cutting in around ceilings, skirting boards and door frames. The shape gives you a bit more control and makes those edges feel much less intimidating, especially if you are still getting used to painting without covering everything in masking tape first.
You will also want different brushes depending on what you are painting. Smaller brushes are useful for detailed areas, mouldings and awkward corners, while bigger brushes make more sense on larger surfaces. If you are painting woodwork, furniture, masonry or anything outside, it is worth checking that the brush and paint are actually suitable for the surface rather than assuming one tool will do everything.
The same goes for rollers.
A medium pile roller is a good all round option for most interior walls, while a mini roller is really handy for tighter areas, doors, panelling and smaller projects. Different sleeves are designed for different finishes and surfaces, so it is worth matching the roller to the job if you want the finish to look right.
The part people often rush is the preparation.
It is very tempting to open the paint and just get going, but filling holes, sanding rough patches, caulking gaps and protecting the floor usually makes far more difference than people expect.
A few basic prep tools are worth keeping in your kit because you will use them again and again. Filler, decorators caulk, sanding blocks, a scraper and a filling knife are the sort of things that end up coming out on almost every room.
Masking tape is useful too, especially while you are learning. It can make edges feel much easier to control around sockets, skirting and trims, although as you get more confident with a good angled brush you may find you use less of it.
And of course, walls are only the beginning.
Once you start doing more around the house, you quickly realise there are loads of things you can paint. Panelling, MDF, furniture, doors, radiators, pipework, cupboards and even some tiles and appliances can all be refreshed, but the paint, primer and tools need to suit the material.
That is exactly where our WIW Guides come in.
If you are not sure what you need for a particular job, have a look through the guides before you start. The idea is to make DIY feel a bit less confusing and help you work out what to buy, what to prep and what is realistically worth having a go at yourself.
For smaller decorating essentials like brushes, rollers, tape and sanding tools, we tend to link through Amazon. For bigger renovation materials and preparation products, Travis Perkins is also useful, especially when a decorating job starts turning into a slightly bigger project.
Some of the links on Winging It Works are affiliate links, which means we may earn a small commission if you buy through them, at no extra cost to you.
You do not need a professional toolkit to start.
You just need the right basics for the job in front of you, and somewhere to begin.
Test Before You Paint: Why Colours Look Different at Home
A paint colour can look perfect online, beautiful on a colour card and completely different once it is on your wall.
That is one of the reasons we always think tester pots are worth the effort.
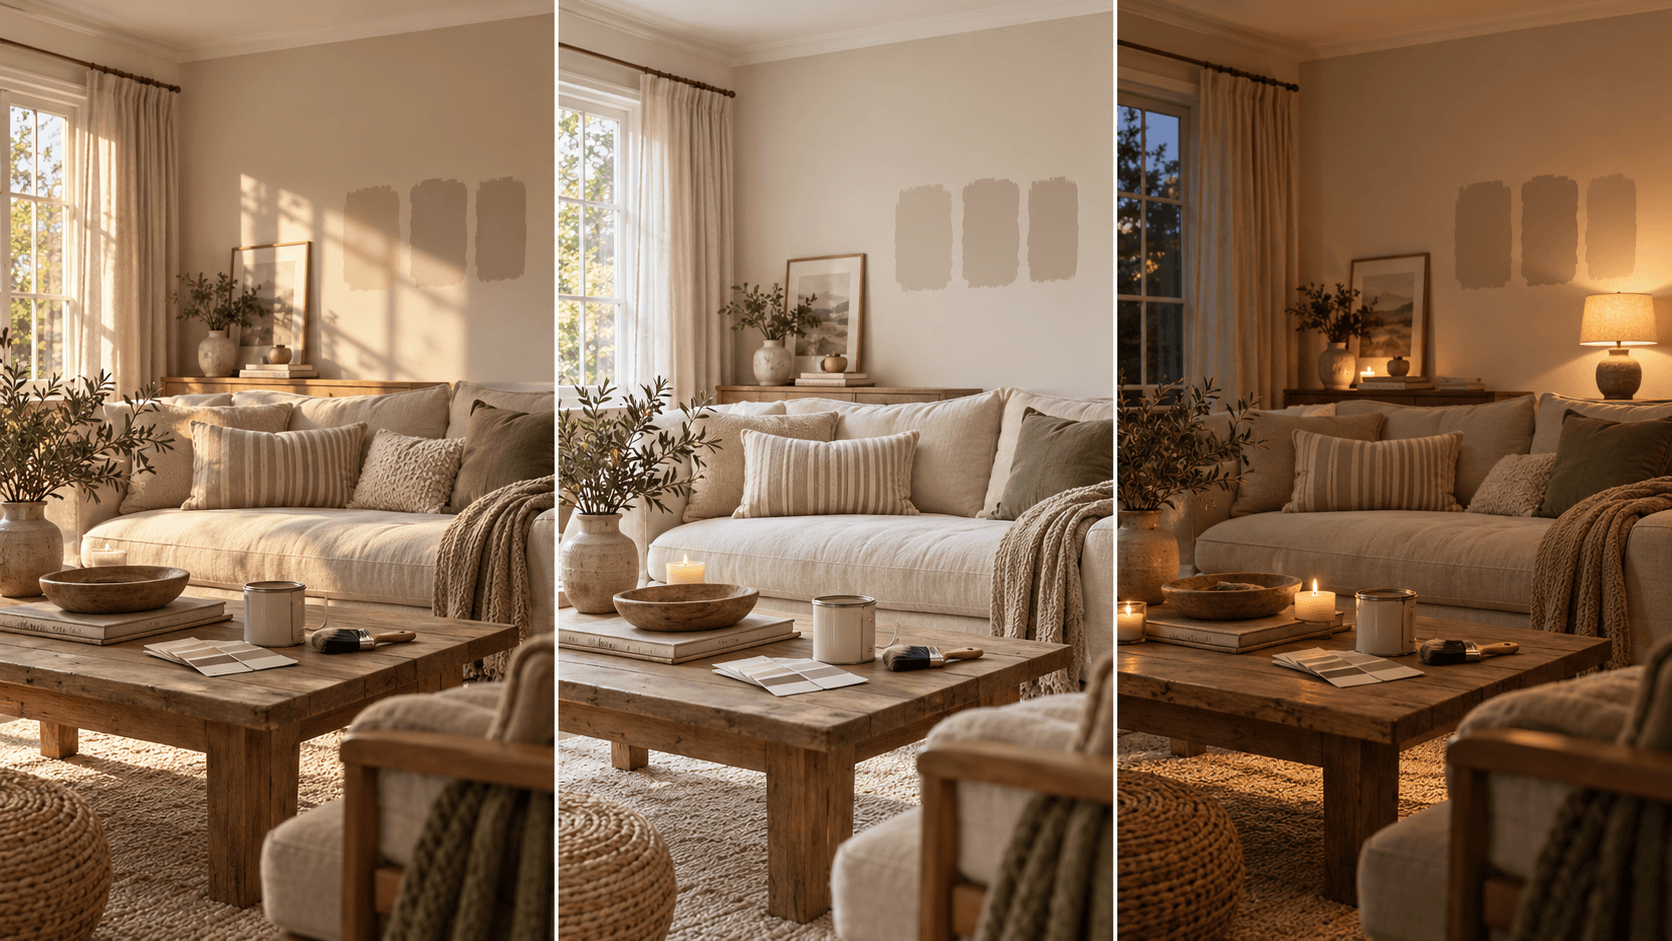
Paint is a bit of a chameleon. It changes depending on the light, the direction your room faces, the flooring, the furniture and even the time of day. A colour that feels warm and soft in the morning can look cooler, greyer or much deeper by the evening.
North facing rooms tend to receive cooler, more indirect light. That can make some colours feel flatter or bring out blue and grey undertones you might not have noticed before.
South facing rooms usually have warmer, brighter light for more of the day. Colours can look richer and warmer here, and softer shades often feel brighter than expected.
Then there is everything in between.
Morning light is different from late afternoon light. Artificial lighting changes things again. Warm bulbs, cool bulbs, lamps and overhead lighting can all shift how the same colour feels.
That is why choosing paint from a photo alone can be risky.
Online images are great for inspiration, but screens vary and styled room photos are often taken in very specific lighting. The colour on the tin or colour card is only part of the story too. Your room will always have the final say.
If you are undecided, try a few shades from the same palette rather than committing to just one.
If you like a warm neutral, test two or three that sit close together. If you are choosing between greens, blues or deeper tones, compare them side by side and look at them at different times of day.
It is also worth painting a decent sized sample rather than a tiny square.
A larger area gives you a much better feel for the colour, especially once you start seeing how it works next to skirting boards, flooring, furniture and other finishes in the room.
And do not make the decision five minutes after painting it.
Live with it for a little while. Look at it in the morning, during the day and again in the evening. You may be surprised by which one you keep coming back to.
If you are still struggling between a couple of options, our Room Studio can help you visualise different shades in your own space before you commit.
The main thing is not to rush it.
The right colour is not always the one you liked most on the screen. It is the one that works best in your room, in your light, throughout the day.
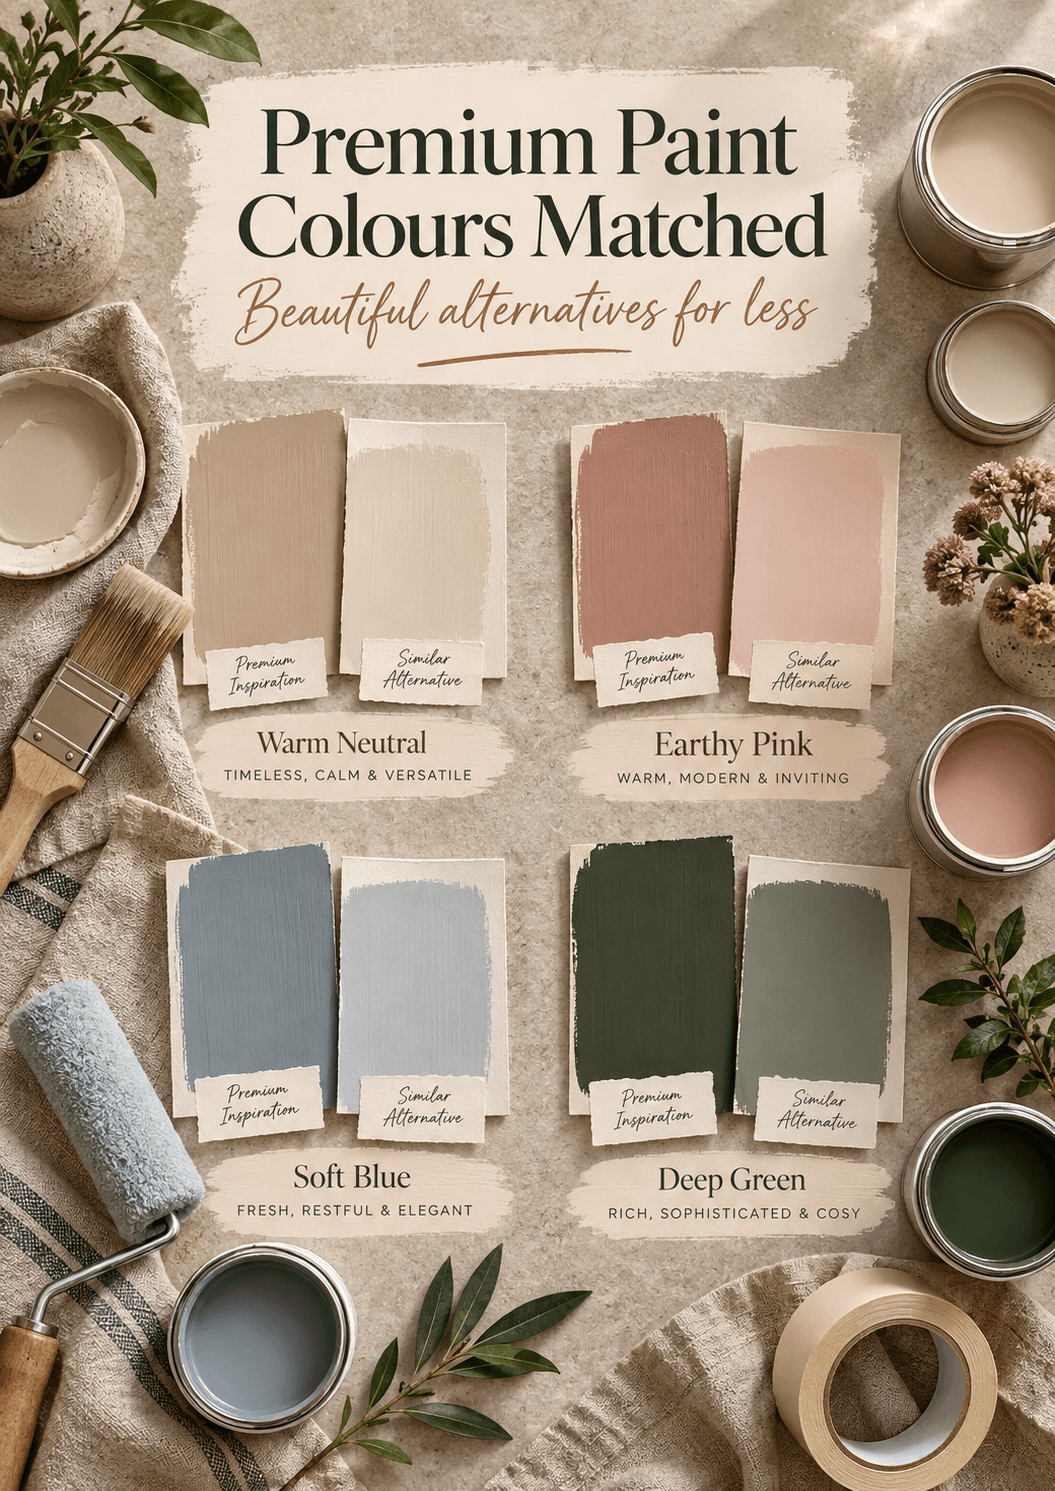
Premium Paint Colours Matched: Beautiful Alternatives for Less
There are some paint colours that just seem to be everywhere.
You see them on Pinterest, in beautifully styled homes, on renovation accounts and in magazines, and before long you start recognising the names too. Farrow & Ball, Little Greene and other premium brands have some absolutely gorgeous colours, but they also come with a premium price tag.
That does not mean they are not worth it.
Sometimes you love the exact colour, finish and overall look and you are happy to spend the extra. Other times, especially if you are painting a whole room or several rooms, it is worth seeing what else is out there.
That is where colour matching can be really useful.
A matched colour will not necessarily be identical to the original. Different brands use different bases, finishes and formulations, so even when the colour looks very close, the finished result can still behave differently on the wall.
For us, it is less about finding an exact copy and more about finding a beautiful alternative that gives you the same overall feel.
Sometimes you might be drawn to a warm neutral, a deep green or a soft blue and realise that what you actually love is the tone rather than the name on the tin.
And that opens up a lot more options.
If you are decorating on a budget, the savings can add up too. Premium paints can cost considerably more than mainstream or trade ranges, especially once you start buying enough for multiple coats, larger rooms or several spaces.
Sometimes that extra spend is worth it.
Sometimes we would rather put the difference towards lighting, flooring, handles, furniture or another part of the room.
There is no right answer.
It really comes down to what matters most to you in that particular project.
Travis Perkins also offers paint mixing services at selected branches, which can be useful if you have a particular colour in mind and want to explore a mixed alternative. It is worth checking your local branch first, as services can vary by location.
The biggest thing we would say is always test it.
Do not assume a colour will look the same in your home as it does online, on a colour card or in someone else’s room.
Light changes everything.
A north facing room can make colours feel cooler, while a south facing room can make the same shade feel warmer and brighter. Flooring, furniture and artificial lighting all play a part too.
If you are comparing a premium colour with a matched alternative, put both on the wall if you can.
Look at them in the morning. Look again in the afternoon. Then look at them in the evening with the lights on.
You might prefer the original, You might prefer the alternative.
You might decide neither is quite right and move one shade warmer or cooler. That is why we like to treat premium colours as inspiration rather than a rule.
Start with the shade you love, compare what else is available, test a few options and see what actually works in your room.
Beautiful colour does not have to come from the most expensive tin on the shelf.
*Sometimes it will.
Sometimes it will not.
And that is completely fine.*
Accent Walls: How to Choose the Right Wall and Make It Work
Accent walls can completely change a room, but picking the right one is not always as obvious as it sounds.
It does not automatically have to be the wall behind the sofa or the bed. Sometimes the best wall to highlight is the one that already has something going on, like a chimney breast, built in storage, an alcove or the wall you naturally look at when you walk into the room.
Start with where your eye goes first.
If the room already has a focal point, work with it. If it feels a bit flat, an accent can help give the space some shape and personality.
And it does not have to be a whole wall.
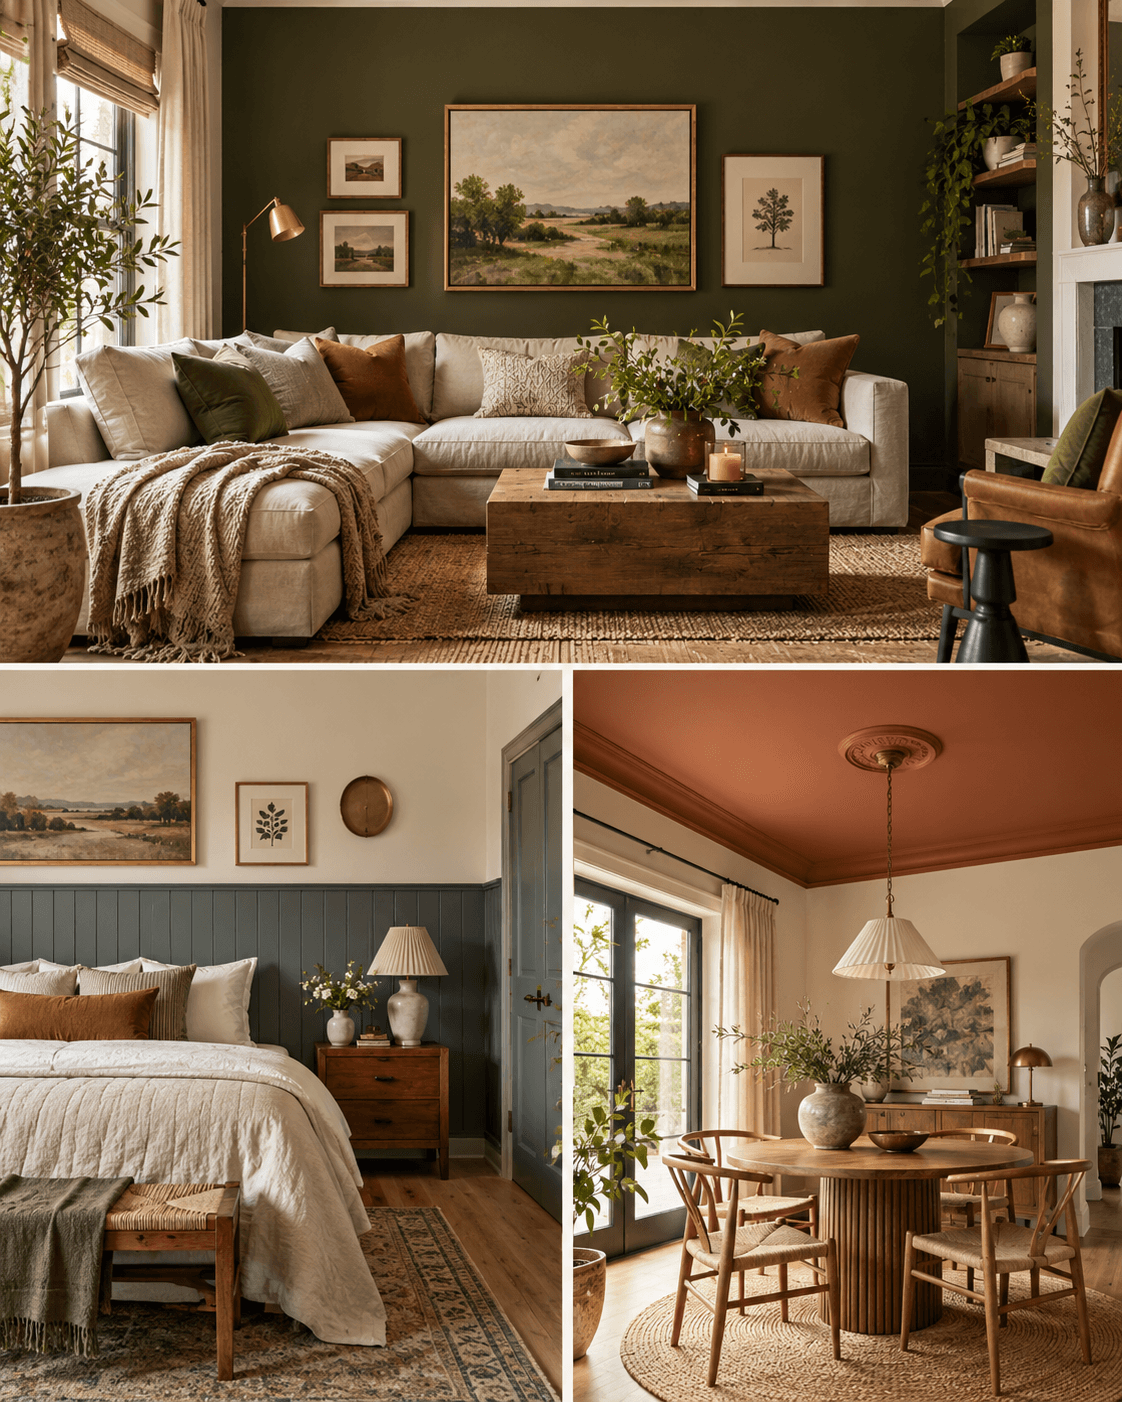
You can split the wall in half, paint the bottom section darker, use panelling below and colour above, create a painted arch or use colour to pick out one part of an open plan room.
We really like that approach in spaces where you want to separate a dining area, desk or little reading corner without actually putting anything physical between them.
The ceiling can be the feature too.
A darker ceiling can make a room feel much cosier, especially if the walls are lighter. You can also take the same colour across the walls and ceiling for more of a drenched look, or just choose a slightly deeper version of the wall colour if you want something softer.
It is worth looking at what else is already in the room before you go really bold.
If you have a patterned sofa, statement curtains or lots of artwork, you might not need another big feature competing for attention. But if the room is quite neutral, a stronger colour or wallpaper can be exactly what it needs.
Wallpaper works really well on an accent wall too. Behind the bed, on a chimney breast or inside an alcove can give you pattern without making the whole room feel busy.
And if you are nervous, start smaller.
Paint the inside of an alcove. Try the wall behind a shelving unit. Add colour above panelling. Or take the feature onto the ceiling instead.
There are so many ways to do it now that “feature wall” does not have to mean one random wall painted a different colour.
## Try it before you commit
This is where Room Studio can really help.
Upload your own room and try the accent in different places before you spend money on paint or wallpaper.
Move the darker colour from one wall to another. Try a split wall. Test the ceiling. See what happens if you take the colour further around the room.
Sometimes the version you had in your head is not the one that ends up looking best once you actually see it in the space.
Try a few versions in Room Studio first, then go with the one that feels right for your room.
An accent can be a wall, half a wall, a chimney breast, an alcove, panelling, wallpaper or even the ceiling.
There really are no hard rules.
It just needs to make sense in the room you are decorating.
Painting Radiators & Pipework: Hide Them, Match Them or Make Them a Feature
Radiators and exposed pipework are one of those things you can stop noticing until you decorate the room around them. Then suddenly the bright white radiator or copper pipework stands out against everything else.
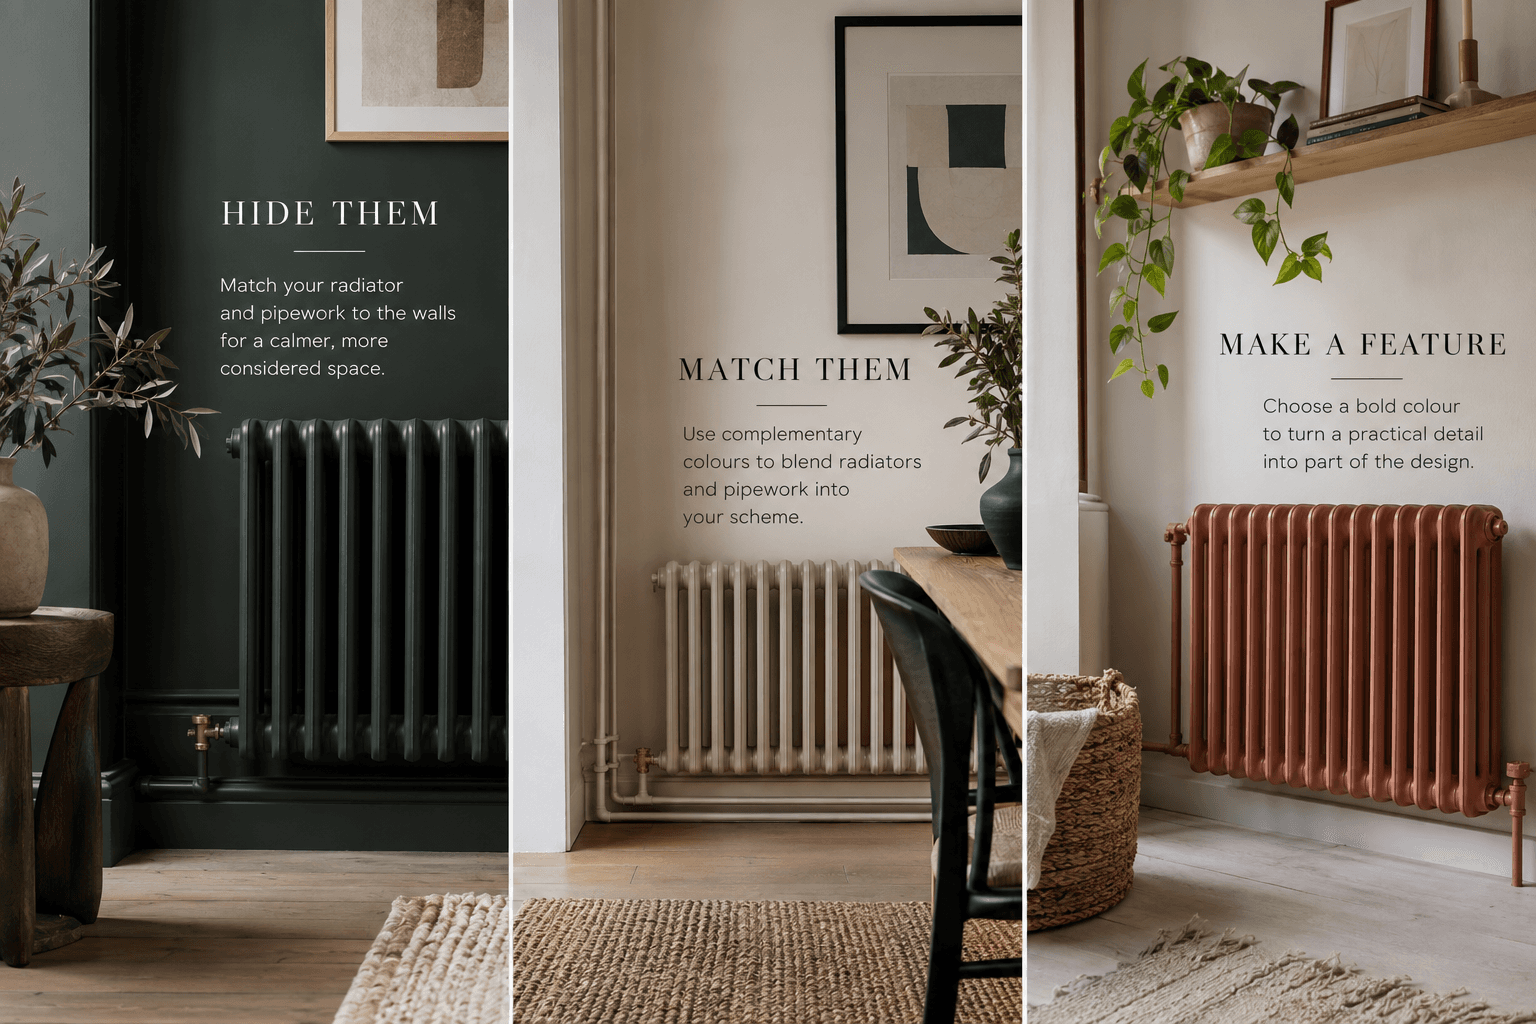
The good thing is you have options. You can make them disappear into the room, match them to the walls or turn them into part of the design.
Matching the radiator to the wall is probably one of the easiest ways to make a room feel more considered. It works particularly well with deeper colours, panelling and colour drenched spaces because the radiator stops breaking up the wall visually.
The same goes for pipework.
If the pipes are visible and you do not want them to become a feature, painting them in the same colour as the wall can help them blend in much more naturally.
On the other hand, sometimes it is worth doing the opposite. A dark radiator against a pale wall, a soft neutral against a deeper colour, or even a bold finish can make something practical feel intentional rather than something you are trying to hide.
The important bit is using products that are actually suitable for the surface.
Radiators and metal pipework need proper preparation, and the paint needs to be appropriate for metal and able to cope with heat where necessary. Do not just use leftover wall paint and hope for the best.
Start by making sure the radiator is switched off and completely cool.
Clean it properly, remove dust and grease, lightly sand the surface if required and deal with any rust before you start painting. Depending on the existing finish and the product you are using, you may also need a suitable primer.
For pipework, preparation is just as important. Clean it, lightly key the surface where needed and use the correct primer and finish for the metal you are working with.
A small brush or mini roller is usually much easier than trying to use full sized decorating tools around all the awkward edges.
And take your time around valves and fittings.
You do not want paint building up where parts need to move or be accessed later.
Think about the whole room before choosing the colour.
If you are colour drenching, carrying the wall colour onto the radiator can make the whole space feel calmer. If the radiator sits underneath a window, matching it to the wall or trim can stop that area feeling broken up.
If you have beautiful traditional radiators, you might decide they deserve to stand out instead.
There is no rule saying radiators have to be white.
The same applies to exposed pipework. Sometimes hiding it visually is the right answer. Sometimes painting it confidently makes it feel like part of the room.
If you are unsure, try the idea in Room Studio first.
You can experiment with matching the radiator to the wall, going darker, or taking the same colour across panelling and pipework before you commit. It is a small detail, but it can make a surprisingly big difference to how finished a room feels.
And like most DIY, the result is usually in the preparation.
Clean it properly, use the right products and do not rush the finish.
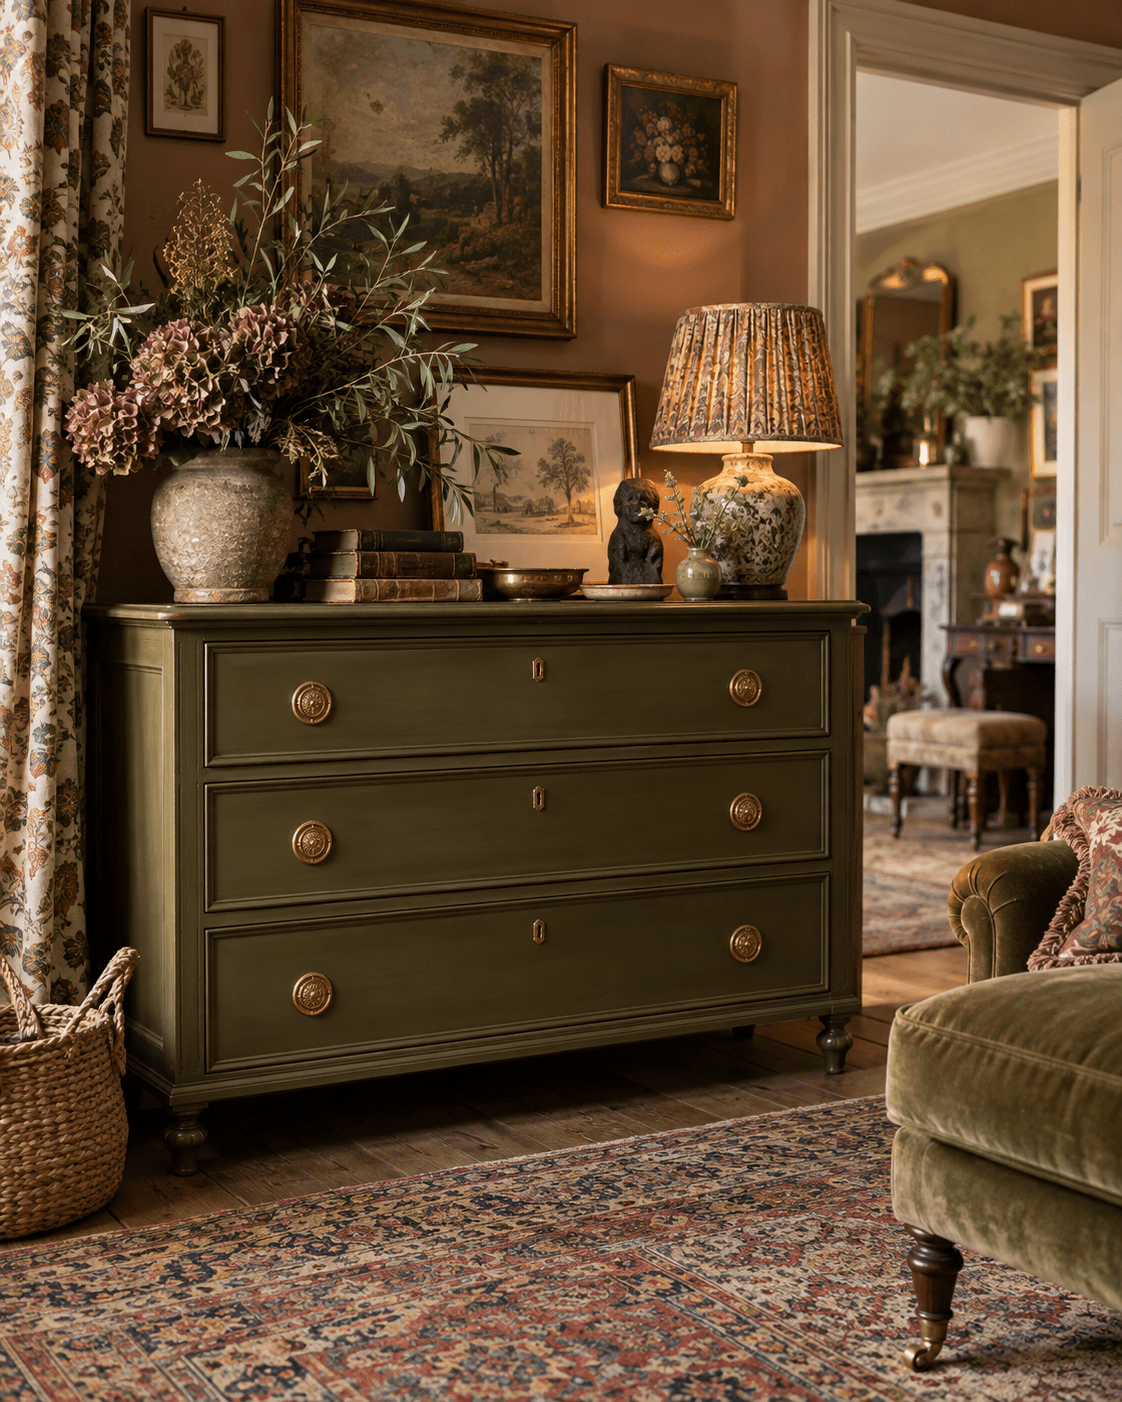
Painting Furniture: How to Give Old Pieces a New Look
Painting furniture is one of those jobs I really love because you can take something that feels tired or dated and completely change it without spending a fortune.
Some of the best pieces are not new at all. They are inherited, found on Facebook Marketplace, picked up second hand, thrifted, or sitting somewhere in the house because you have never quite known what to do with them.
Quite often, the piece itself is actually fine.
The shape works. The storage works. The size works. It just needs a bit of imagination.
A chest of drawers, bedside table, sideboard or cabinet can look completely different with the right prep, a new colour and some different hardware.
The prep is the bit that really matters.
Before you paint anything, work out what the surface actually is. Solid wood, MDF, laminate and previously painted furniture all need slightly different treatment, so it is worth checking first rather than assuming the same process will work for everything.
Sanding is probably the stage people are most tempted to rush, but it makes such a difference.
If the surface is rough or has an old finish that needs taking back, start with a lower grit and gradually work your way up through finer ones. The higher grits help smooth everything out and leave you with a much better surface to paint.
You do not always need to sand something right back to bare wood, but you do need to remove anything loose, smooth out imperfections and make sure the new finish has something to hold onto.
We always keep a mix of sanding papers and blocks because one grit rarely does everything. We link the ones we actually use through our Amazon recommendations, along with mini rollers, brushes and the smaller bits of kit that make these jobs much easier.
Once it is sanded, clean it properly.
Dust left behind will absolutely show through the paint, especially on darker colours, so it is worth taking the extra few minutes to get the surface ready.
Then you can start thinking about the finish.
A mini roller is great on larger flat areas if you want something smoother, while brushes are better for edges, corners, mouldings and awkward details. An angled brush can be especially useful on furniture with more shape to it.
And try not to pile the paint on.
A couple of thinner coats usually gives you a much nicer result than trying to get full coverage in one go.
For furniture paints, brands like Frenchic are really popular because they are designed specifically for upcycling and furniture projects and come in loads of colours and finishes. We will link the products and tools we would actually use, so if you are not sure where to start, you have something practical to work from.
Then there is the hardware, which can make just as much difference as the paint.
Changing the handles can completely shift the look of a piece.
Brass, black, chrome, ceramic or leather pulls can all change the feel, or you can keep the original hardware and clean it up if it suits the piece.
You can go further too.
Leave some of the original wood showing. Paint just part of it. Add new legs. Line drawers. Use leftover wallpaper inside a cabinet. Fill old handle holes and move the hardware somewhere else.
That is usually the part where the piece starts to feel like yours.
Before you buy something new, have a look at what you already have. Check Marketplace. Look in charity shops. Ask family if they have anything tucked away in a garage or spare room.
Sometimes the best pieces are the ones that just need another chance.
Shop the tools we use
Where we recommend sanding papers, brushes, rollers, hardware or other smaller tools, some of those links are affiliate links.
That means if you click one of our links and go on to buy something, Winging It Works may earn a small commission from the retailer. It does not cost you anything extra.
We only use those links to point you towards the types of products we actually use ourselves or would genuinely choose for the job. You do not have to buy through them, but if you do, it helps support the site and allows us to keep creating more guides and project content.
If you are unsure what grit to use, how to prep the surface or what tools you actually need, use the WIW Guides alongside the product links.
Take your time with the prep, do not skip the sanding, choose the right finish and think about the hardware.
Sometimes that is all it takes to turn something old into a piece you would never think about replacing.
Stencilling Walls & Floors: How to Get a Patterned Look With Paint
Stencilling is one of those decorating ideas that can look really expensive when it is done well, but it can actually be a really affordable way to add pattern, character and a more individual feel to your home.
It is also a really good option if you love the look of wallpaper, patterned tiles or hand painted detail, but do not want the full cost or commitment that can come with them.
What I like about stencilling is how versatile it is.
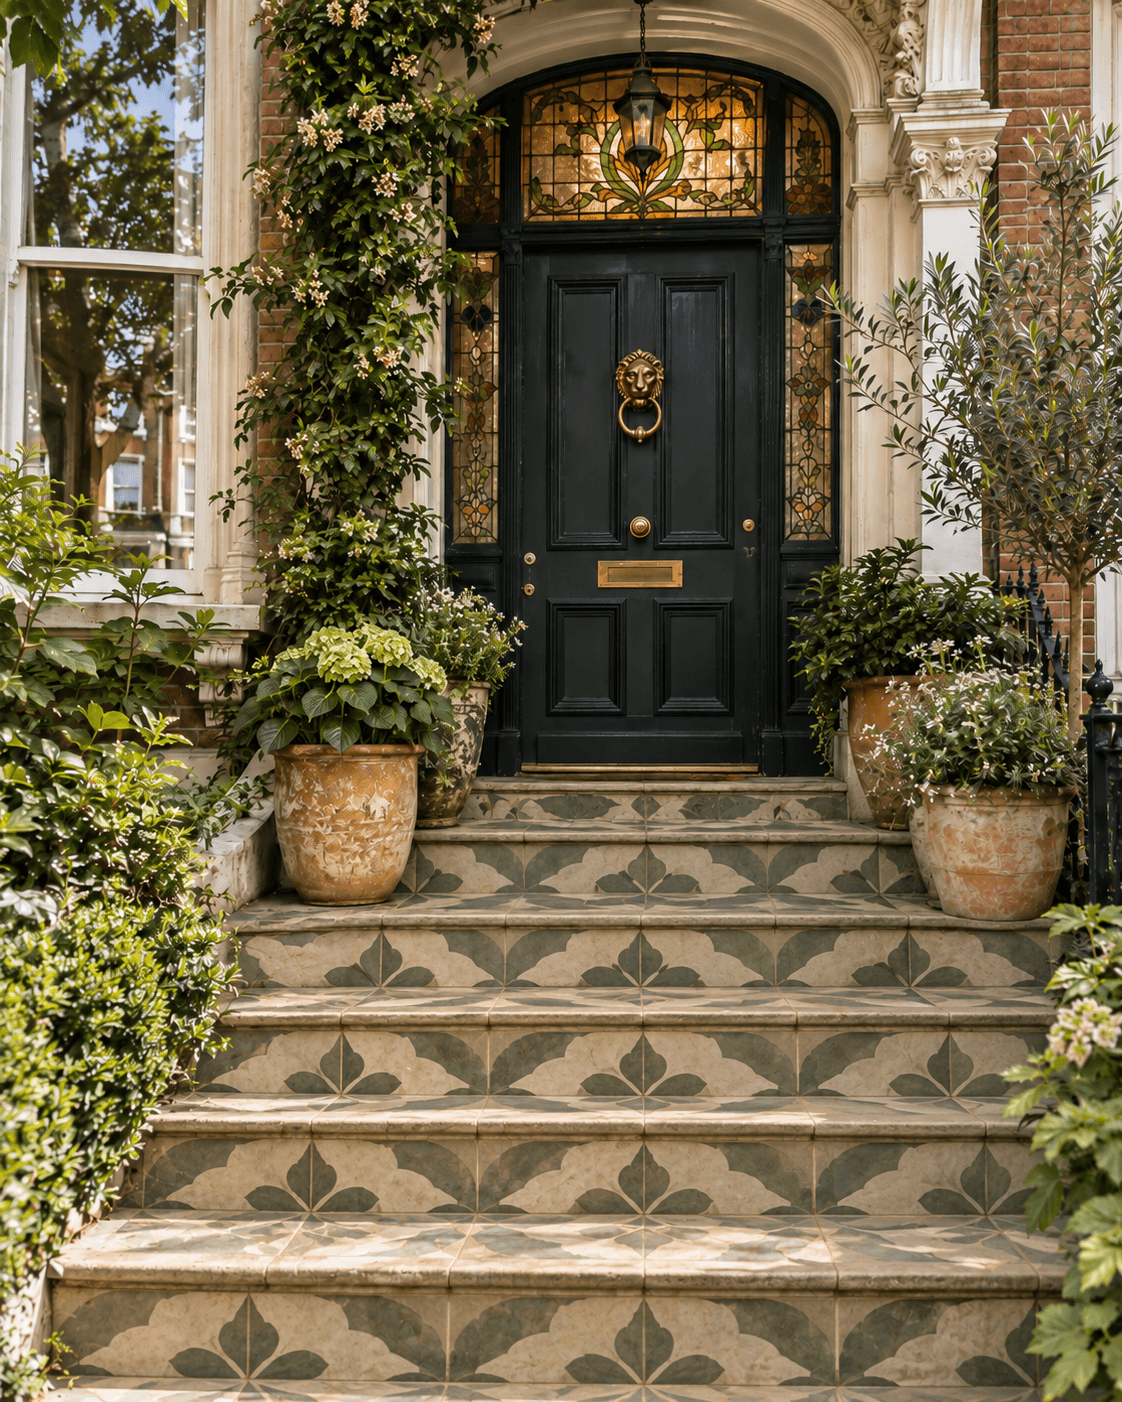
You can use it inside or outside, on walls, floors, furniture, fireplaces, steps and tiles, and it works just as well for a subtle layered look as it does for something much bolder.
It is a brilliant way to repurpose surfaces too.
Old bathroom tiles, tired kitchen tiles or worn garden tiles can all feel completely different with the right prep, the right paint and a pattern that suits the space. The same goes for concrete, floorboards, planters, garden walls and smaller outdoor corners that need a bit more personality.
Inside the home, stencilling can work beautifully in hallways, cloakrooms, utility rooms, kitchens, bathrooms, bedrooms and nurseries.
A full patterned wall can make a real statement, but you do not always have to go that far. It can look just as good inside an alcove, behind shelving, across the lower half of a wall, around a fireplace or as a more decorative detail in a child’s room or nursery.
For nurseries especially, stencils are such a lovely option because you can create something playful and personal without fully wallpapering the whole room. Soft repeated motifs, stars, florals, scallops or more delicate patterns can give the room interest without it feeling too busy.
And if you love the look of printed walls, stencilling can give you that feel in a way that is much more flexible.
You can go full pattern, keep it tonal, add a border, create a feature panel or repeat a motif across one wall. It is a really good way to make a room feel more custom and considered.
The prep matters just as much as the stencil itself.
Whatever you are painting needs to be properly cleaned, sound and suitable for decorating. Depending on the surface, that could mean sanding, priming or using a paint designed for tiles, floors or exterior areas.
That part really matters if you want the finish to last.
Tiles in kitchens and bathrooms need the right prep because they have to cope with moisture, splashes and regular wiping down. Outdoor tiles and surfaces need paints that are suitable for exterior use and able to deal with changing weather and wear.
It is also worth taking time with the layout before you start.
Measure properly, think about where the pattern begins and ends, and mark out your spacing so it looks intentional. That is especially important on floors and tiled areas, where a pattern can look off very quickly if it starts drifting.
When it comes to painting, less really is more.
A stencil brush or small foam roller usually works best, but do not overload it. Too much paint is what causes bleeding and spoils the edges. It is much better to build the colour up gradually than try to get full coverage in one go.
If you are using more than one colour, keep the palette fairly considered. Two or three shades are often enough to create a beautiful layered look without making it feel overdone.
For something softer, try tonal colours that sit close together.
For something more striking, a stronger contrast can work really well, especially on floors or in smaller spaces like a downstairs toilet.
Floors and tiles need a little more thought.
If you are stencilling a bathroom floor, kitchen floor or garden tile, make sure the products are suitable for the surface and durable enough for the space. You may also need a protective topcoat once the pattern is complete.
That extra step is usually worth it.
A beautiful finish is no good if it cannot cope with actual life.
For tools, I would usually reach for a stencil brush or foam roller, masking tape, sanding paper, measuring tools and the right paint for the surface I am working on.
We link the smaller tools and accessories we use through our Amazon affiliate recommendations, so if you are looking for stencil brushes, rollers, tapes or sanding supplies, that is a good place to start. If you buy through one of our affiliate links, Winging It Works may earn a small commission at no extra cost to you.
The best thing about stencilling is that it can be as subtle or as bold as you want it to be.
You can repurpose old tiles, print pattern onto a plain wall, add detail to a nursery, bring life back into a tired floor or create something outside that feels far more finished and personal.
It is one of those ideas that gives you a lot of impact without necessarily needing a huge budget.
And when it is done well, it looks anything but basic.
Painting Kitchen Cupboards: Is It Worth Doing Yourself?
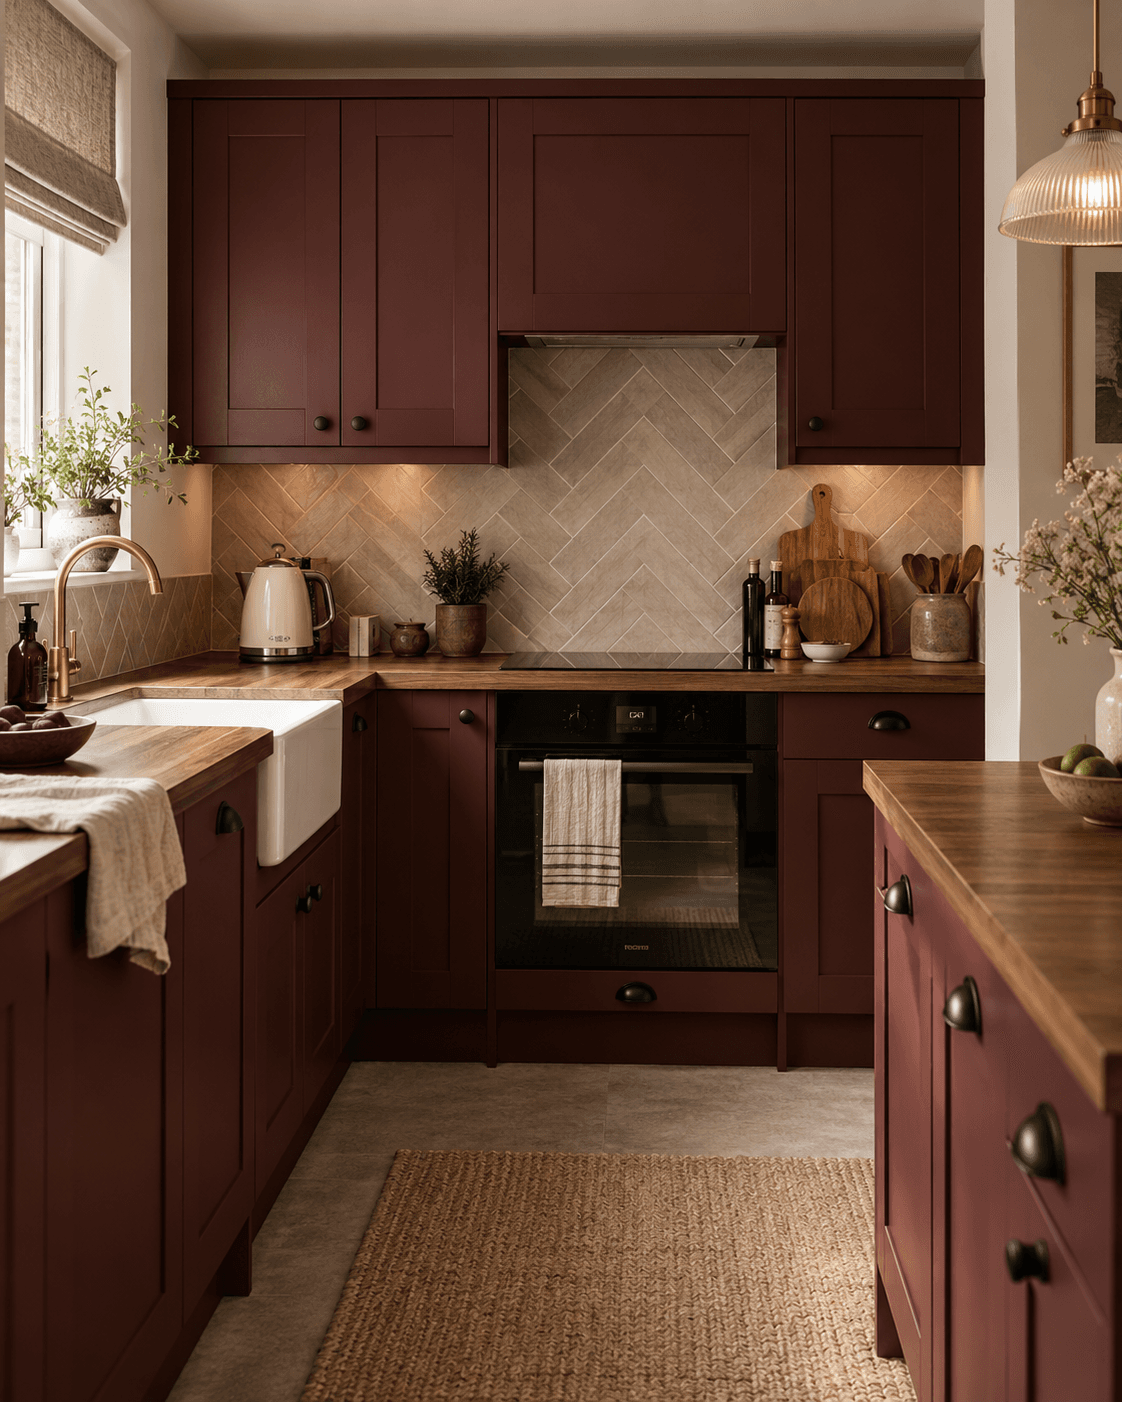
Painting kitchen cupboards can make a massive difference without the cost of replacing the whole kitchen.
If the layout works and the cupboards themselves are still in good condition, sometimes you really do not need to rip everything out. A new colour, better hardware and a bit of thought around the finish can completely change how the room feels.
That is why it can be such a good option if you want to refresh the kitchen for less.
The main thing is being realistic about what you are starting with.
If the doors are damaged, swollen or falling apart, paint is not going to fix that. But if they are sound, you have got a really good base to work from.
Prep is everything with kitchen cupboards.
They pick up grease, fingerprints and general kitchen grime, so they need to be cleaned properly before you even think about painting.
Then you need to work out what the doors are made from. Wood, MDF, laminate and previously painted doors all need slightly different prep, and some surfaces will need a suitable primer as well.
It is the boring bit, but it is also the bit that will make the difference between something that looks good for a few weeks and something that actually lasts.
For flat doors, a mini roller can give you a really smooth finish. A good brush is useful for edges, corners and any moulding or detail.
And if your kitchen doors are very plain, you can actually add moulding before you paint them to give them a completely different look.
We talk about using moulding and colour drenching in our Maximalism article, and both can work really well in kitchens.
You could add simple trim to flat cupboard doors to make them feel more detailed, or take the cupboard colour onto the walls, skirting and even the ceiling if you want the whole room to feel more considered.
The paint finish matters too.
Kitchen cupboards get touched and cleaned constantly, so you want something durable and easy to wipe down. A suitable eggshell, satin or specialist cupboard paint will normally make much more sense than a flat wall paint.
Then there is the hardware.
This is one of the easiest ways to make the kitchen feel completely different.
New handles can change the whole direction of the room. Brass, black, chrome, ceramic, cup handles, knobs... even keeping the existing ones and cleaning them up can work if they still suit the look.
If the new handles do not fit the old holes, fill them before painting and reposition them properly.
That little detail can make the finished result feel much more intentional.
The other thing we always look at is where the saving can be spent elsewhere.
If painting the cupboards means you are not replacing the kitchen, maybe that gives you room in the budget for better lighting, a new tap, shelving, a splashback or something else that makes the whole room feel more finished.
That is where refreshing instead of replacing can really work.
For the job itself, you will normally need a proper degreaser, sanding paper or blocks, primer if the surface needs it, mini rollers, brushes, masking tape and trays.
We link the smaller tools and bits we use through our Amazon affiliate recommendations. If you buy through one of those links, Winging It Works may earn a small commission at no extra cost to you.
If your kitchen is structurally fine and you are just bored of how it looks, painting the cupboards can be a really good place to start.
Sometimes a new colour, a better finish and different hardware is enough to make the whole room feel new again.
Can You Paint Tiles? Kitchens, Bathrooms & Outdoor Spaces
Painting tiles can be a really good way to refresh a space without ripping everything out.
If the tiles are still sound but you hate the colour, pattern or overall look, paint can give you another option before you start thinking about replacement.
It can work especially well in kitchens, bathrooms, utility rooms and even some outdoor spaces, but the surface you are painting and the products you use really matter.
Prep is the bit that makes or breaks it.
Tiles need to be completely clean before you start, especially in kitchens and bathrooms where grease, soap residue and moisture can build up over time.
Once they are clean, you may need to lightly sand the surface, use a suitable primer and then choose a paint designed for tiles or the type of surface you are working with.
This is not one of those jobs where ordinary wall paint will usually do the trick.
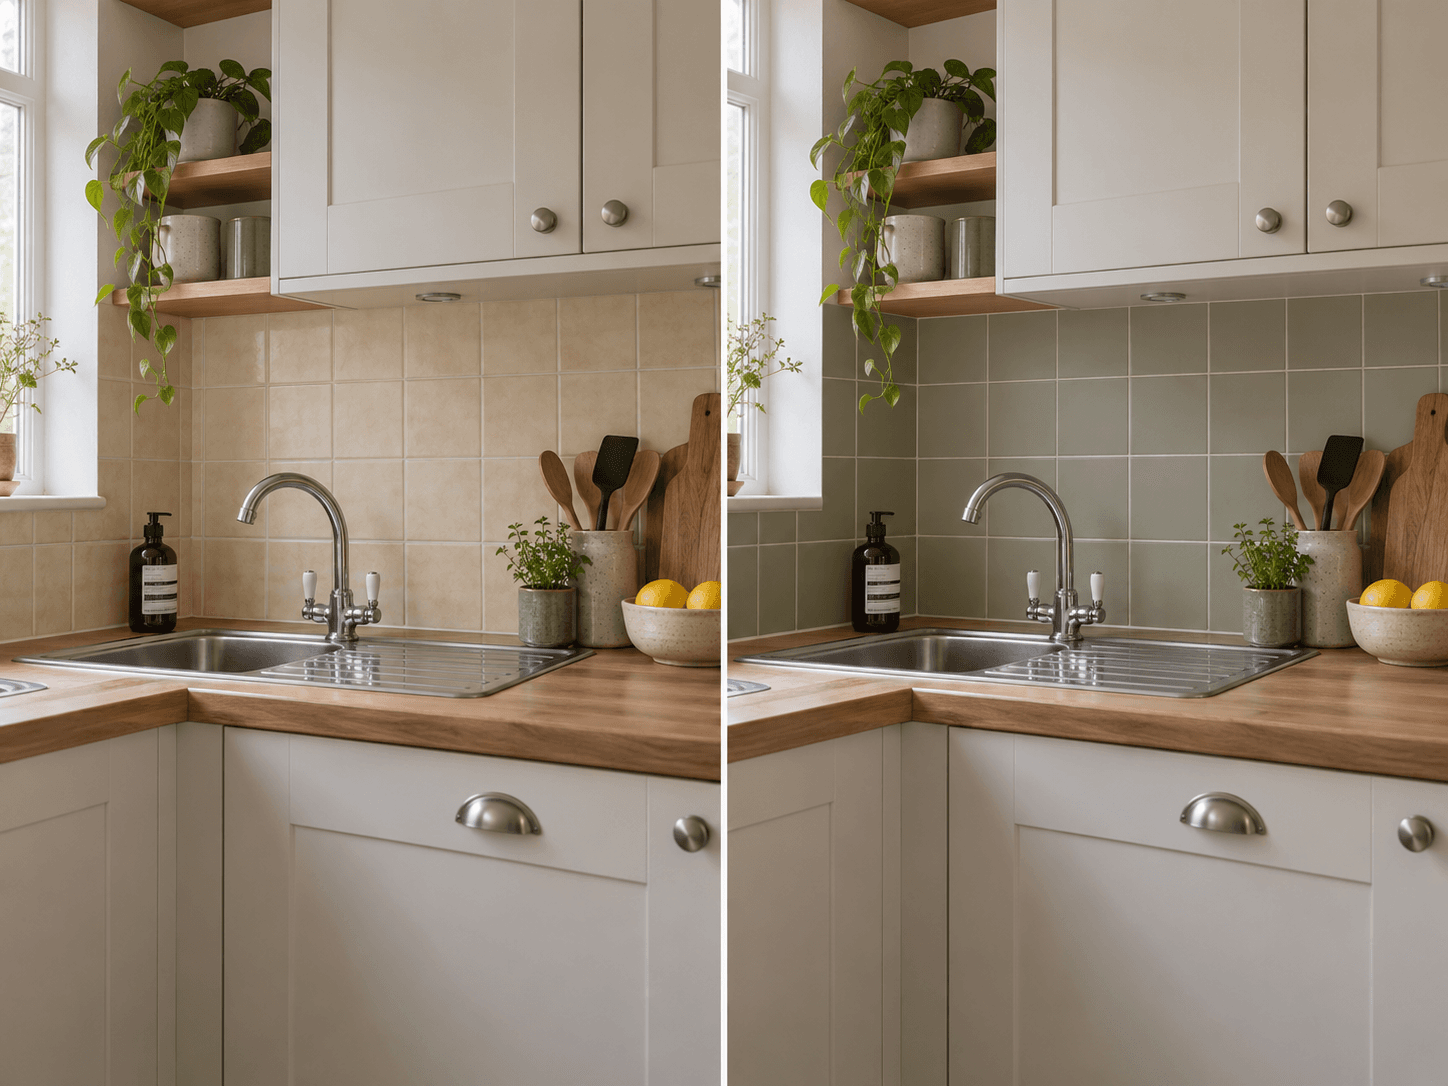
For kitchen splashbacks, painting can be a really useful way to change the colour without replacing the tiles themselves.
In bathrooms, it can work well on wall tiles, particularly in lower traffic areas, but you need to be realistic about how much water and wear the surface is going to get.
The closer you get to showers, baths and very wet areas, the more important it is to use the right products and follow the manufacturer guidance properly.
Floors need even more thought because they take far more wear.
If you are painting floor tiles, the paint needs to be suitable for foot traffic and the surface may need a protective topcoat depending on the system you are using.
The same applies outside.
Patio tiles, steps and other outdoor tiled areas can sometimes be refreshed with suitable exterior products, but they need to cope with weather, moisture and temperature changes.
You can also use paint to completely change the style of the tiles.
If you do not want a flat colour, stencilling can work really well over painted tiles and give you a patterned look for much less than replacing them.
We talk about this more in our stencilling article, including using repeated patterns on floors, steps and tiled areas.
A tired tile can suddenly feel completely different with the right base colour and a simple pattern over the top.
The biggest thing is knowing when painting is worth it.
If the tiles are cracked, loose or badly damaged, paint is not going to solve the problem.
But if the surface is sound and you simply do not like how it looks, painting can be a much cheaper way to refresh the room and buy yourself time before a bigger renovation.
Sometimes that is all you need.
For sanding blocks, mini rollers, masking tape and prep tools, have a look at our Amazon recommendations. For primers, fillers and heavier renovation materials, check our Travis Perkins links.