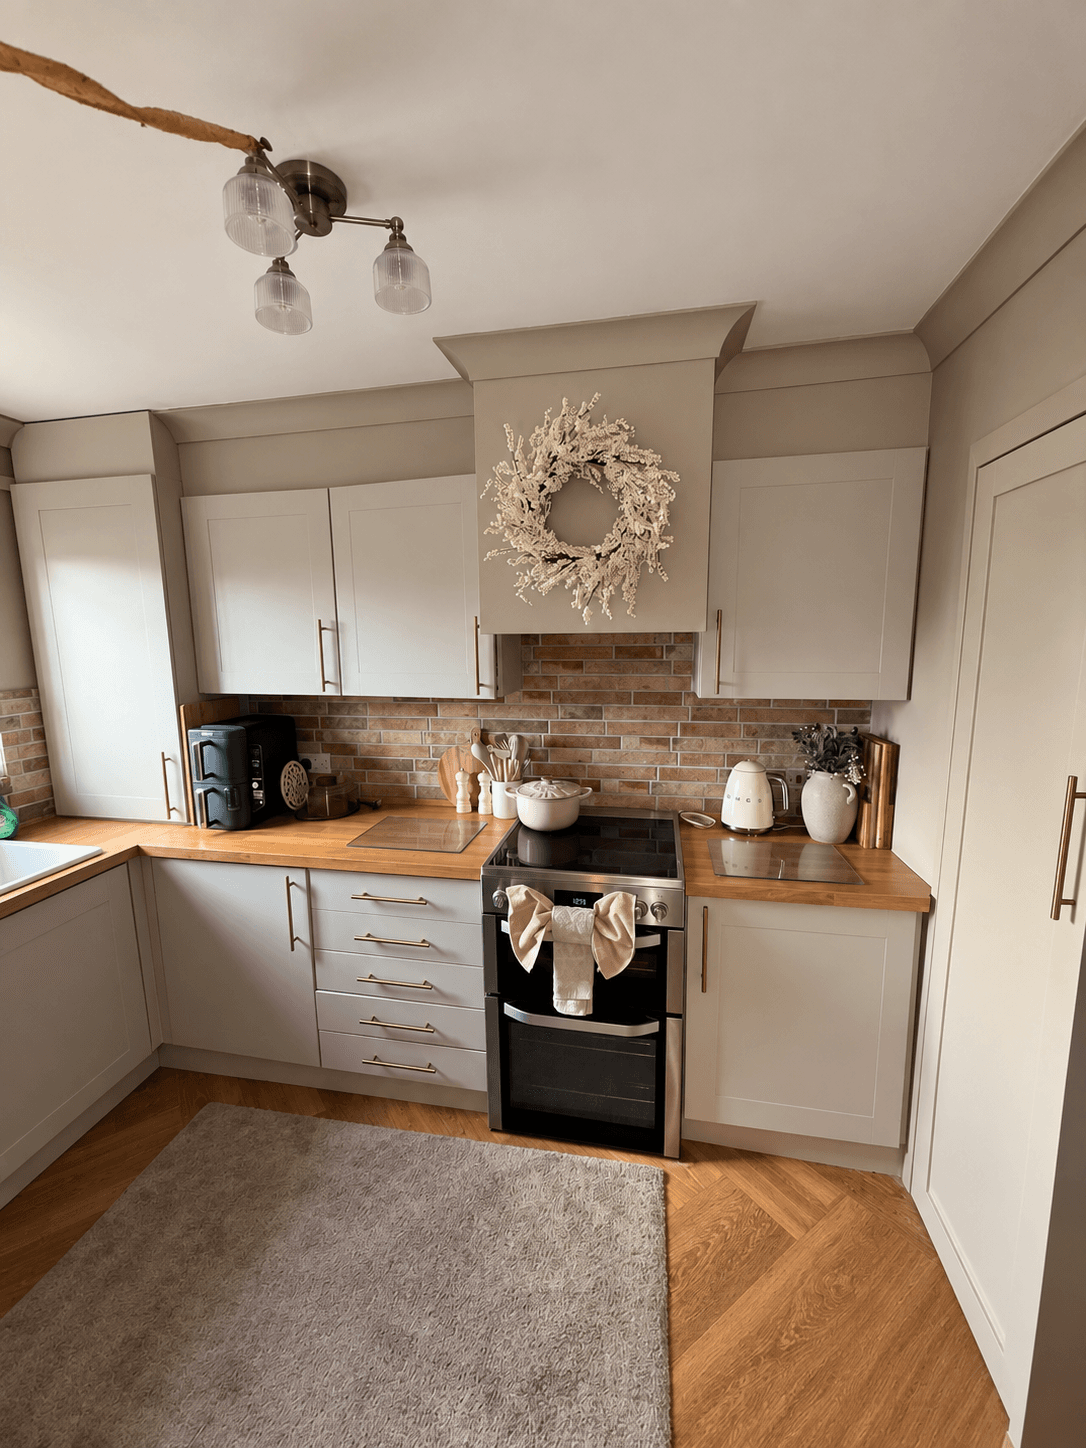
The bit before the reveal
Why we started it.
The kitchen already worked, but there was one thing we kept coming back to: we needed more useful storage without making the room feel more crowded.
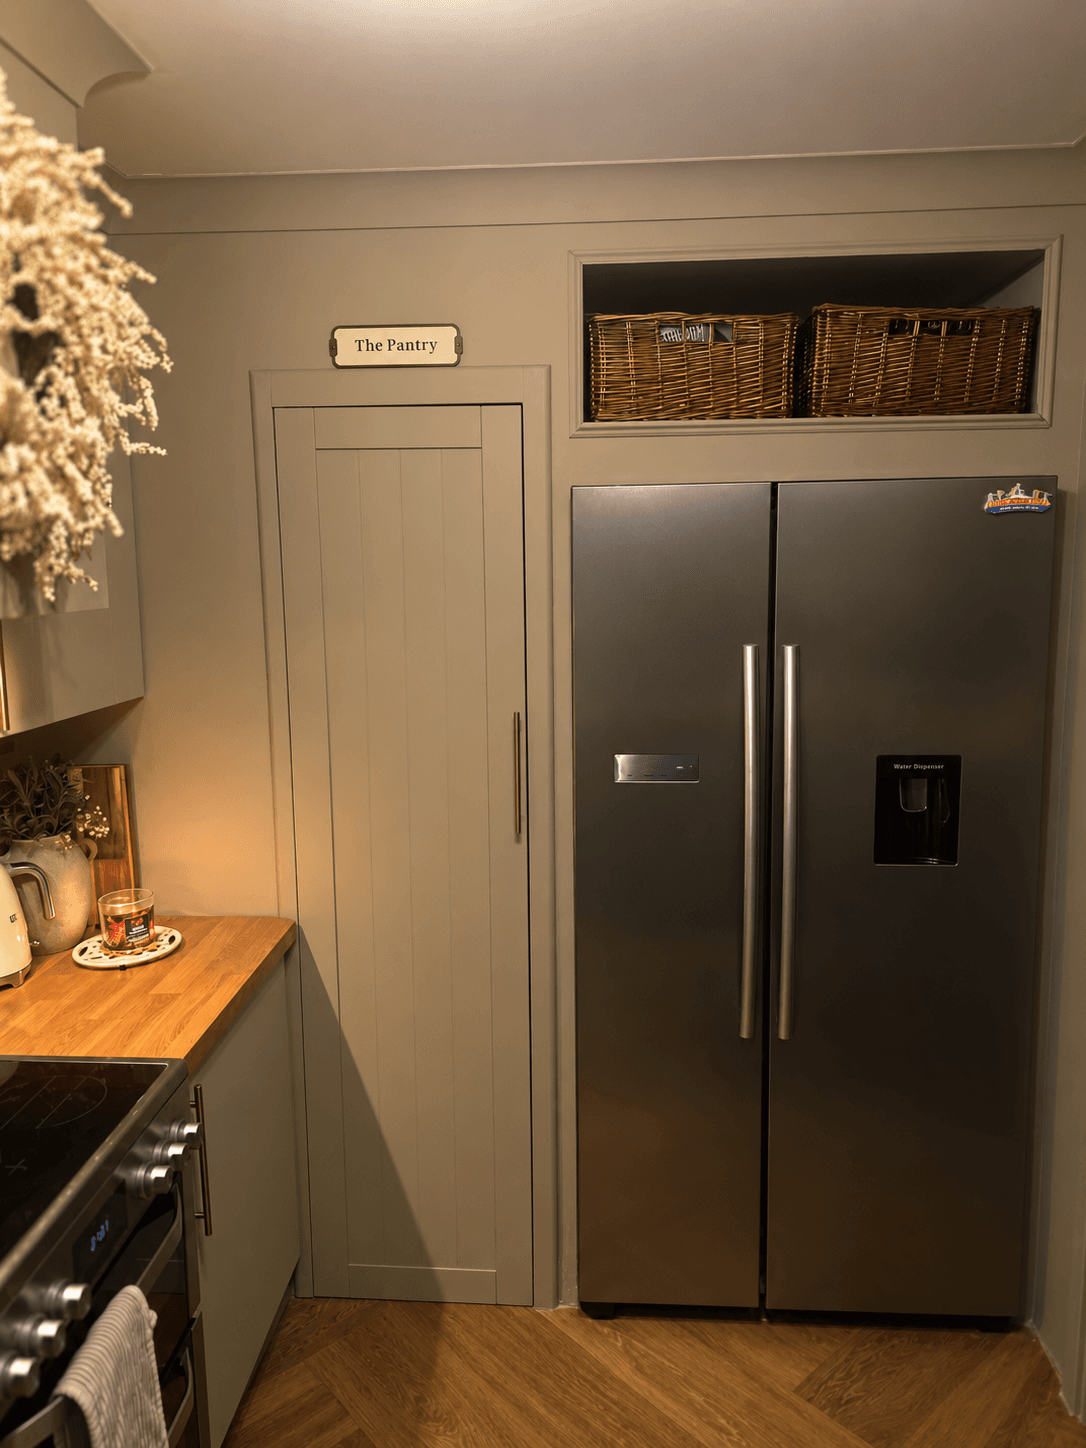
We used the space beside the fridge to create a proper pantry, then refreshed the kitchen around it so the new addition felt like it had always belonged there.
The result is not a full kitchen replacement. It is the kind of project we love most: keep what works, build what is missing and make the room feel better without starting again.
One decision at a time
How it came together.
- 01
Work out what the room was missing
We started with storage rather than style: what needed a home, what space was being wasted and what we could change without replacing the whole kitchen.
- 02
Build the pantry into the room
The new pantry was framed and finished beside the fridge so it read as part of the kitchen rather than a separate cupboard.
- 03
Refresh the finishes
Paint, trim, handles and the surrounding details were brought together so the old and new parts of the kitchen felt intentional.
- 04
Live with it and adjust
Once the storage was in use, we changed the small things that only become obvious when a room is working every day.
What we used
The shopping list.
We only show a quantity or cost when we have actually recorded it. If something is missing, we would rather leave it blank than make a number up.
| Material | Quantity | Recorded cost | Notes |
|---|---|---|---|
| Framing timber | Not recorded | Not recorded | Used to form the pantry structure. |
| Sheet and finishing materials | Not recorded | Not recorded | Used to close, trim and finish the pantry walls and opening. |
| Pantry door and ironmongery | 1 set | Not recorded | No note |
| Paint and decorating materials | Not recorded | Not recorded | No note |
| Kitchen handles and finishing details | Not recorded | Not recorded | No note |
Tools we reached for
- Tape measure
- Long spirit level
- Mitre saw
- Drill/driver
- Multi-tool
- Filling and decorating tools
- Suitable PPE
The useful bit
What went wrong. What we’d do differently.
Trying to make a new pantry look original to the room takes more finishing work than the framing itself.
The useful depth of storage matters more than simply making the cupboard as large as possible.
Next time, we would remember:
Start with what you actually need to store, then size the space around that.
Matching trim lines and finishes is what makes an added structure feel built in.
A refresh can change the room without the cost and waste of replacing everything.
A closer look.
Questions we’d ask too
Before you copy anything.
Was this a full kitchen replacement?
No. We kept the kitchen and concentrated on the pantry, storage and finishes that would make the biggest difference.
Did you build the pantry yourselves?
Yes. We built and finished it as part of the wider kitchen refresh, learning the details as we went.
Can I copy the pantry dimensions?
Use your own room, appliances and storage needs as the starting point. The proportions that worked here were specific to our kitchen.
Project complete. We’ll keep this page updated if we learn anything new.